Building ai-directory-monitor: Merging URLs and Monitoring Sitemaps
Project Genesis
Unveiling AI-Directory-Monitor: My Journey into the World of AI Domains
From Idea to Implementation
1. Initial Research and Planning
2. Technical Decisions and Their Rationale
-
Framework Choice: I chose Nuxt.js for its powerful features, such as server-side rendering, static site generation, and a rich ecosystem of modules. This decision was driven by the need for a framework that could handle both performance and SEO effectively.
-
NuxtHub Integration: Leveraging NuxtHub was a strategic choice to streamline the development process. It provides a comprehensive set of tools and services that simplify deployment and management, allowing me to focus on building features rather than infrastructure.
-
UI Design: I opted for Nuxt UI Pro to ensure that the application would have a modern and responsive design. This decision was influenced by the need for a visually appealing user interface that enhances user experience.
-
Authentication: The integration of Nuxt Auth Utils was crucial for implementing social authentication. This choice was made to provide users with a seamless login experience, which is essential for user retention.
3. Alternative Approaches Considered
-
Using a Different Framework: Initially, I explored other frameworks like React and Angular. However, I ultimately decided against them due to their steeper learning curves and the additional complexity they would introduce for this specific project.
-
Custom Authentication Solutions: I contemplated building a custom authentication system from scratch. However, this would have required significant time and effort, and I recognized that using Nuxt Auth Utils would provide a more secure and reliable solution with less overhead.
-
Static Site Generation vs. Server-Side Rendering: I weighed the benefits of static site generation against server-side rendering. While static generation offers performance benefits, I opted for server-side rendering to ensure dynamic content could be served efficiently, which is crucial for user-driven applications.
4. Key Insights That Shaped the Project
-
Community Feedback: Engaging with the Nuxt community provided valuable feedback and insights. This interaction helped refine the project’s features and ensured that the application addressed real-world developer needs.
-
Iterative Development: Emphasizing an iterative development approach allowed for continuous improvement. By regularly testing and deploying features, I could gather user feedback and make necessary adjustments in real-time.
-
Documentation and Support: The importance of comprehensive documentation became evident as I developed Gavarnie. Clear documentation not only aids in onboarding new developers but also enhances the overall usability of the project.
-
Focus on Scalability: From the outset, I prioritized scalability in both the architecture and the codebase. This foresight ensures that as the application grows, it can accommodate increased traffic and additional features without significant refactoring.
Conclusion
Under the Hood
Technical Deep-Dive: Gavarnie - A Full-Stack NuxtHub Project
1. Architecture Decisions
Key Architectural Choices:
- Modular Design: The application is structured in a way that separates concerns, making it easier to manage and scale. Each feature (like authentication, user profiles, etc.) is encapsulated in its own module.
- Server-Side Rendering (SSR): By utilizing Nuxt’s SSR capabilities, Gavarnie ensures that the application is SEO-friendly and provides a better user experience through faster initial page loads.
- Environment Configuration: The use of a
.envfile for configuration allows for easy management of environment variables, which is crucial for different deployment environments (development, staging, production).
2. Key Technologies Used
- Nuxt.js: A powerful framework for building Vue.js applications, providing features like SSR, static site generation, and a rich ecosystem of modules.
- Nuxt UI Pro: A UI component library that allows for rapid development of responsive and visually appealing user interfaces.
- NuxtHub: A platform that combines backend and frontend capabilities, streamlining the development process for full-stack applications.
- Nuxt Auth Utils: A library that simplifies the implementation of authentication mechanisms, including social logins.
- Cloudflare: Used for deployment, providing performance optimization and security features.
3. Interesting Implementation Details
Built-in Authentication
// Example of setting up authentication in Nuxt
export default {
  auth: {
    strategies: {
      google: {
        clientId: 'YOUR_GOOGLE_CLIENT_ID',
        codeChallengeMethod: '',
        responseType: 'token',
      },
    },
  },
}
Profile Management
<template>
  <div>
    <h1>User Profile</h1>
    <form @submit.prevent="updateProfile">
      <input v-model="email" type="email" placeholder="Update Email" />
      <button type="submit">Update</button>
      <button @click="removeAccount">Remove Account</button>
    </form>
  </div>
</template>
4. Technical Challenges Overcome
Dependency Management
pnpm for package management, which helps in reducing disk space usage and improving installation speed. The decision to use Corepack ensures that the correct package manager is used consistently across different environments.# Enabling Corepack
corepack enable
# Installing dependencies
pnpm installDeployment Process
# Command to deploy using NuxtHub CLI
npx nuxthub deploy
SEO Optimization
Conclusion
Lessons from the Trenches
Step 1: Combine the URL Lists
.ai scrape and another from the domain with ‘ai’ in the title, you can combine them into a single list. Here’s a simple example in Python:# Sample URL lists
ai_urls = [
"https://example1.ai",
"https://example2.ai",
# Add more URLs from your .ai scrape
]
domain_ai_urls = [
"https://example3.com/ai",
"https://example4.com/ai",
# Add more URLs from your domain scrape
]
# Combine the lists
combined_urls = list(set(ai_urls + domain_ai_urls))
# Print combined URLs
for url in combined_urls:
print(url)Step 2: Monitor Sitemaps for New URLs
requests to fetch the sitemap and xml.etree.ElementTree to parse it. Here’s a basic example:import requests
import xml.etree.ElementTree as ET
def fetch_sitemap(url):
try:
response = requests.get(url + "/sitemap.xml")
response.raise_for_status() # Raise an error for bad responses
return response.text
except requests.RequestException as e:
print(f"Error fetching sitemap for {url}: {e}")
return None
def parse_sitemap(sitemap_content):
urls = []
root = ET.fromstring(sitemap_content)
for child in root.findall('{http://www.sitemaps.org/schemas/sitemap-image/1.1}url'):
loc = child.find('{http://www.sitemaps.org/schemas/sitemap-image/1.1}loc').text
urls.append(loc)
return urls
# Monitor each combined URL
for url in combined_urls:
sitemap_content = fetch_sitemap(url)
if sitemap_content:
new_urls = parse_sitemap(sitemap_content)
# Here you can add logic to check for new URLs and add them to your site
print(f"New URLs found in {url}: {new_urls}")Step 3: Key Technical Lessons Learned
- Error Handling: Always implement error handling when making network requests to avoid crashes due to network issues.
- Data Structures: Use sets to avoid duplicate URLs when combining lists.
- XML Parsing: Familiarize yourself with XML parsing libraries to handle sitemap data effectively.
Step 4: What Worked Well
- The combination of URL lists was straightforward using Python’s list and set functionalities.
- Fetching and parsing sitemaps using requests and ElementTree was efficient for extracting URLs.
Step 5: What You’d Do Differently
- Implement a more robust monitoring system that checks for changes in sitemaps at regular intervals (e.g., using a cron job).
- Consider using a database to store previously found URLs to easily check for new additions.
Step 6: Advice for Others
- Start with a clear plan for how you will combine and monitor URLs.
- Test your code with a small set of URLs before scaling up to ensure it works as expected.
- Keep your code modular to make it easier to maintain and update in the future.
What’s Next?
Project Development Analytics
timeline gant
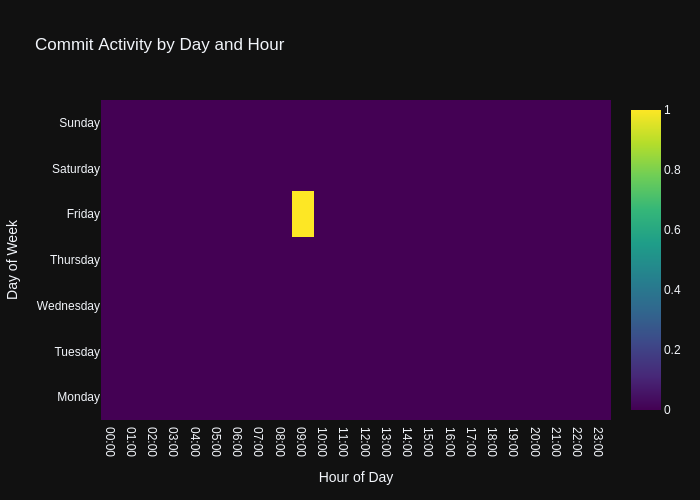
Commit Activity Heatmap
Contributor Network

Commit Activity Patterns
Code Frequency
- Repository URL: https://github.com/wanghaisheng/ai-directory-monitor
- Stars: 0
- Forks: 0
编辑整理: Heisenberg 更新日期:2025 年 1 月 6 日