From Idea to Reality: Building a Canva Clone for Creative Design Mastery
Project Genesis
Crafting Creativity: My Journey to Building a Canva Landing Page
From Idea to Implementation
Initial Research and Planning
Technical Decisions and Their Rationale
-
Framework Selection: We chose React for the front-end development due to its component-based architecture, which allows for reusable UI components. This decision was driven by the need for a dynamic and responsive user interface that could handle real-time interactions.
-
State Management: To manage the application’s state effectively, we opted for Redux. This choice was made to maintain a predictable state container, which is crucial for an interactive application where user inputs and design changes need to be reflected immediately across the interface.
-
Backend Services: For the backend, we decided to use Node.js and Express. This combination was selected for its non-blocking architecture, which is well-suited for handling multiple simultaneous connections, a common scenario in interactive applications.
-
Gamification Elements: We integrated gamification features such as points, badges, and levels to motivate users. This decision was based on research indicating that gamified experiences can significantly enhance user engagement and retention.
Alternative Approaches Considered
-
Using a Monolithic Architecture: Initially, we contemplated building a monolithic application. However, we ultimately decided against this due to scalability concerns. A microservices architecture was deemed more appropriate for future growth and feature expansion.
-
Different Frameworks: While React was our final choice, we also evaluated Angular and Vue.js. Each framework has its strengths, but React’s flexibility and large community support made it the most suitable for our needs.
-
Static vs. Dynamic Content: We considered creating a static website for the initial launch. However, we recognized that an interactive platform would better serve our educational goals, leading us to develop a dynamic web application.
Key Insights That Shaped the Project
-
User-Centric Design: Engaging with potential users during the research phase highlighted the importance of user-centric design. Feedback from users emphasized the need for intuitive navigation and a visually appealing interface, which became central to our design philosophy.
-
Importance of Feedback Loops: We learned that incorporating feedback loops—where users can see the results of their actions in real-time—enhances the learning experience. This insight led to the implementation of features that allow users to experiment with designs and receive immediate feedback.
-
Community Engagement: The value of building a community around the platform became apparent. We recognized that fostering a space for users to share their designs and learn from each other would enhance the educational experience. This insight guided our decision to include social features in the application.
-
Iterative Development: Embracing an iterative development approach allowed us to refine features based on user testing and feedback continuously. This flexibility was crucial in ensuring that the final product met user needs and expectations.
Under the Hood
Technical Deep-Dive: Canva Clone
1. Architecture Decisions
Key Architectural Components:
- Front-End: Built using React, the front-end is responsible for rendering the user interface and managing user interactions. It communicates with the back-end via RESTful APIs.
- Back-End: The back-end is built using Node.js and Express, providing a robust server environment to handle requests and serve data to the front-end.
- Database: A NoSQL database (e.g., MongoDB) is used to store user data, design templates, and other relevant information, allowing for flexible data modeling.
Design Patterns:
- Component-Based Architecture: The front-end is structured into reusable components, promoting code reusability and separation of concerns.
- MVC Pattern: The back-end follows the Model-View-Controller (MVC) pattern, separating the application logic, data handling, and user interface.
2. Key Technologies Used
- React: A JavaScript library for building user interfaces, enabling the creation of dynamic and responsive web applications.
- Node.js: A JavaScript runtime built on Chrome’s V8 engine, allowing for server-side scripting and handling asynchronous requests.
- Express: A minimal and flexible Node.js web application framework that provides a robust set of features for web and mobile applications.
- MongoDB: A NoSQL database that stores data in flexible, JSON-like documents, making it easy to work with unstructured data.
- Socket.IO: A library for real-time web applications, enabling bi-directional communication between the client and server, which is useful for features like live collaboration.
3. Interesting Implementation Details
Interactive Chatbot Development
app.post('/api/chatbot', (req, res) => {
    const userMessage = req.body.message;
    const botResponse = generateResponse(userMessage); // Function to generate response
    res.json({ response: botResponse });
});
Gamified Learning Experience
if (user.completedChallenge) {
    user.badges.push('Design Master');
    await user.save();
}
4. Technical Challenges Overcome
Real-Time Collaboration
socket.on('designUpdate', (data) => {
    // Broadcast the design update to all connected clients
    socket.broadcast.emit('designUpdate', data);
});
Performance Optimization
const LazyLoadedComponent = React.lazy(() => import('./LazyLoadedComponent'));

function App() {
    return (
        <React.Suspense fallback={<div>Loading...</div>}>
            <LazyLoadedComponent />
        </React.Suspense>
    );
}
User Authentication
const authenticateJWT = (req, res, next) => {
    const token = req.header('Authorization');
    if (token) {
        jwt.verify(token, process.env.JWT_SECRET, (err, user) => {
            if (err) {
                return res.sendStatus(403);
            }
            req.user = user;
            next();
        });
    } else {
        res.sendStatus(401);
    }
};
Conclusion
Lessons from the Trenches
Key Technical Lessons Learned
-
Component-Based Architecture: Building the Canva Clone reinforced the importance of a component-based architecture in React. It allowed for better organization of code, reusability of components, and easier debugging.
-
State Management: Managing state effectively was crucial for the interactive features of the application. Utilizing tools like React’s Context API or Redux helped in maintaining a global state that could be accessed across various components.
-
Responsive Design: Implementing responsive design principles was essential to ensure that the application worked well on different devices. Using CSS frameworks like Bootstrap or utility-first frameworks like Tailwind CSS made this process smoother.
-
API Integration: Learning how to integrate third-party APIs for features like image editing or design templates was a significant technical lesson. Understanding how to handle asynchronous requests and manage responses was key.
What Worked Well
-
User Engagement: The gamified learning experience was a hit among users. Incorporating elements like quizzes and challenges kept users engaged and motivated to learn.
-
Interactive Features: The interactive chatbot and conversation simulation features were well-received. They provided users with immediate feedback and a hands-on learning experience.
-
Community Contributions: Encouraging contributions from the community led to diverse improvements and features being added to the project. This collaborative approach enriched the project and fostered a sense of ownership among contributors.
What You’d Do Differently
-
More Comprehensive Documentation: While the README provided a good starting point, more detailed documentation on the codebase and specific features would have been beneficial for new contributors and users.
-
Testing Framework: Implementing a more robust testing framework from the beginning would have helped catch bugs earlier in the development process. Using tools like Jest and React Testing Library could have improved code reliability.
-
Performance Optimization: Focusing on performance optimization earlier in the project would have been advantageous. Techniques like code splitting and lazy loading could have improved the application’s load time and responsiveness.
Advice for Others
-
Start with a Clear Plan: Before diving into coding, outline the project’s goals, features, and architecture. This will help keep the development process focused and organized.
-
Embrace Feedback: Actively seek feedback from users and contributors. It can provide valuable insights into what works and what doesn’t, allowing for continuous improvement.
-
Iterate and Improve: Don’t aim for perfection in the first version. Launch a minimum viable product (MVP) and iterate based on user feedback. This approach allows for faster development and more relevant features.
-
Focus on User Experience: Always prioritize user experience in design and functionality. Conduct user testing to understand how real users interact with your application and make adjustments accordingly.
What’s Next?
Conclusion
Project Development Analytics
timeline gant
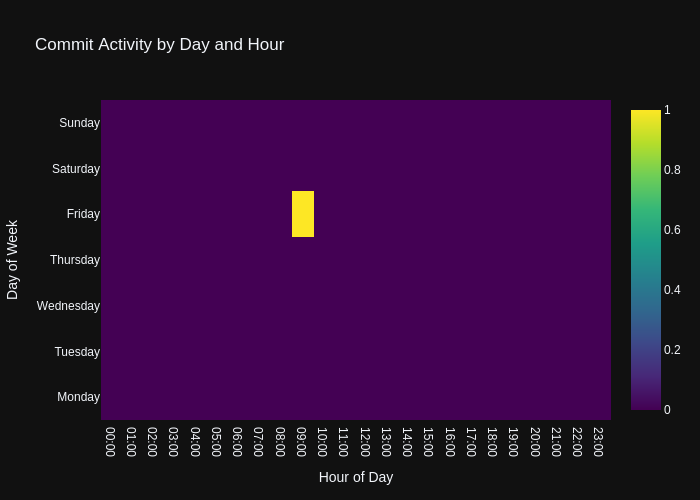
Commit Activity Heatmap
Contributor Network

Commit Activity Patterns
Code Frequency
- Repository URL: https://github.com/wanghaisheng/a-canva-landingpage
- Stars: 0
- Forks: 0
编辑整理: Heisenberg 更新日期:2025 年 1 月 6 日